|
|
If you're restoring an old vintage trailer, you're probably faced with the dilemma of what to do about all the dents in the exterior skin.
Like most aspects of vintage trailer restoration, you have several options. If the dents are shallow and barely noticeable, you can
just leave them alone. If the dents are large and deep you'll probably have to replace sections of your trailer's aluminum siding (a complex & expensive job).
But if you just have some minor dents you want to repair before painting your trailer, you have a third option: so follow the steps below
to learn how you can repair minor dents in your trailer's siding yourself.
|
1. Fig.1 shows some ugly dents in the aluminum skin of
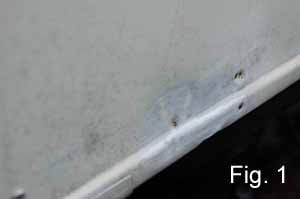
a vintage Shasta trailer. There are even some punctures going all the way through the aluminum! Since dents in the aluminum siding actually stretch the metal,
it's difficult to successfully "pound-out" these dents like you would in a car's steel fender. So we're going to use epoxy filler to fill these blems before
re-painting our trailer (note that this method obviously won't work for a vintage trailer with a polished skin). First, use 80-grit sand paper to carefully
sand away all of the paint/primer in the dent and surrounding area, to expose shiny aluminum and slightly rough-up the surface. Now lightly wipe down the
exposed aluminum with a paper towel dipped in lacquer-thinner to thoroughly clean the bare metal.
2. Now it's time to mix up a small batch of epoxy filler ("Bondo" works, but we use "Fly Weight Gold" by U-POL because it's lighter and
less likely to absorb moisture). For this first batch just mix up a 1"
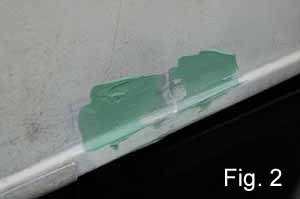
wide blob and use a wide putty knife (wider than the dent, if possible) to carefully fill the dent. Hold the knife at a right-angle to the siding, and slowly move the knife downward,
following the contour and folds in the siding as you spread the filler. You don't want to flex the aluminum inward, so don't push too hard as you spread the filler.
If you didn't mix enough filler, just let this first application harden a little, mix another batch and spread it on top of the first batch.
Don't apply too much because you'll just have to sand it off later. If you slop some filler onto places you didn't mean to, just use a paper towel
dampened with lacquer-thinner to wipe away the errant goop before it hardens (do this sparingly because the lacquer-thinner will slightly
dissolve any paint it touches).
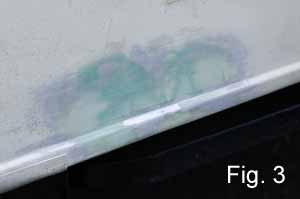
3. In Fig. 3 you can see that we've spread on several batches of epoxy filler (each is a different shade of green because of varying amounts of
catalyst used in each batch), and after the patch has hardened enough (pushing gently with the edge of your your fingernail doesn't leave a mark) we've used sandpaper to smooth it out.
Start with 80 grit sandpaper (1/4th of a full sheet) wrapped around a 1x2 wood block
that's longer
than the dented area. Use this 80 grit to knock off the bumps and high spots but don't scratch the
painted areas around the patch. Next sand the
patch with 120 grit sandpaper to get the patch smooth and close to "on the same plane" as the surrounding metal (know when to stop sanding - most of us sand to the perfect
contour and then sand a little more - making the patch slightly lower than it should be). This sanding will undoubtedly reveal that you need another application
of filler in certain areas of the patch (use a pencil to lightly encircle these areas), so go ahead and mix another small batch of epoxy filler and carefully spread
it on, to fill these "shallow" areas. Once these additional spots of filler have hardened, use the wood block and sand paper to smooth everything out. You'll usually have
to repeat this spread-the-filler-let-it-harden-and-then-sand-it-down process multiple times. Keep repeating the process until the patch is flat, smooth and
follows the contour of the surrounding area. Just before you're done, switch to 220 grit sandpaper for the final sanding, to remove sanding scratches
in the epoxy patch and surrounding painted areas.
4. The patch is now flat and smooth and ready for paint. Using a paper towel dampened with lacquer thinner, wipe down the epoxy patch and
immediate surrounding area. Work quickly and don't use too much lacquer thinner because it can soften the epoxy patch or surrounding paint.
You're just trying to remove any residual dust and
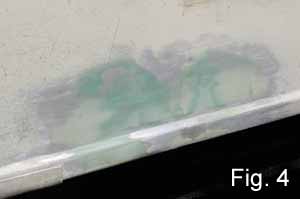
oily fingerprints. For the painting step, you have some choices; if you're going to repaint the whole trailer, then this next step will involve spraying the
epoxy filler patch with primer (using an aerosol can of primer or a spray gun and compressor) in preparation for the trailer repaint.
If your trailer has already been painted and you just want
to paint the patch so it blends in with the surrounding painted siding, it's a little more involved. In this case, you need to find a reputable Auto Paint Store
in your area and have them scan your trailer's painted siding and mix up an aerosol can of custom paint to match your existing painted siding (if you can't take
your trailer to them, remove a painted door or storage hatch cover and take it to the paint store so they can scan in the paint color. Note that before
spraying the patched area with the can of custom color-matched paint, you should first spray the patched area with a coat of quality primer.
5. For priming and/or final painting, you need to thoroughly mask-off the surrounding area so you don't get overspray all over everything.
First, always use green or blue "painter's" masking tape, not the old-school beige stuff. Spread out a drop cloth or old sheet to cover
the ground beneath
the area you'll be painting. Also cover the tires and wheels with a drop cloth or cover them with newspaper and masking tape.
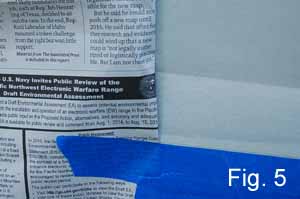
Masking-off around the patch is a little trickier. Fig. 5 is an example of how we masked around a patch that was above a door frame. Using blue masking tape
to cover up the horizontal door frame was straight-forward since the new spray paint will butt up to this frame. But the vertical edge is trickier because
the new layer of paint needs to blend in with the old paint to the left of the patch without leaving a "seam line" where the masking tape was.
In this image notice how we loosely folded under the vertical newspaper on the left, instead of taping it off, so the new spray paint can gently "roll under"
this folded newspaper and subtly blend in with the old paint, instead of creating a hard old-paint vs new-paint "masking tape edge".
6. Here in Fig. 6 you can see the final results of our work.
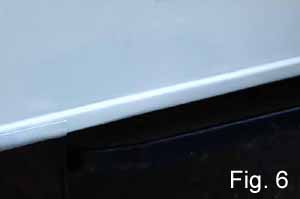
We patched the dents and punctures with epoxy filler, and then we
sanded this epoxy patch to perfection. Then we used a rattle-can of primer to spray on a coat of primer and then used an aerosol can
of custom-matched Urethane paint to spray
on multiple coats of paint to blend in the patched area with the trailer's old paint
(for more painting tips on getting professional results with an aerosol can,
Click Here).
Quite an improvement from Fig. 1 above! Note that you can save time by working on several dents at a time, instead of going through all of the steps
for just one dent, and then repeating them all again for the next dent, etc. Happy sanding!